Salesforce Development: How to Setup Illuminated Cloud 2 with the IntelliJ IDE
What is an IDE?
IDE stands for Integrated Development Environment. Its primary purpose is to make your life as a developer considerably easier by doing things like:
1) Syntax Highlighting
2) Auto-completing functions names, field names, object names, etc.
3) Integrating git easily
4) Improving debugging functionality
5) Putting your command line in the same place you develop.
6) Tons and tons of other things
It is well worth your time to invest an hour or two to figure out how to use an IDE to improve your productivity as a developer.
More info on the IntelliJ IDE here
The Salesforce IDE’s
Back when I started developing on this platform the only IDE’s we had was the Force.com IDE in Eclipse and the Dev Console… if you really count it. Today there are five IDE’s to choose from and I’m gonna walk you through how to install and configure my personal favorite, Illuminated Cloud 2.
Before I get started here are a list of your IDE options and their prices:
1) IntelliJ (Illuminated Cloud 2) – $90 a year
2) Visual Studio Code (SF Plugins) – Free
3) Welkins Suite (Pure SF IDE) – $150 a year4) Eclipse (Retired Force.com IDE) – Free
5) Dev Console – Free
I struck out the last two because you really shouldn’t ever use them even though they are technically available options.
I have tried out all of them and my preference is IntelliJ/Illuminated Cloud 2 and that’s because between the incredible power of the widely used and extremely popular IntelliJ IDE and the impeccable work Scott Wells has put into Illuminated Cloud 2 to help it leverage all of those IntelliJ features for SF development, it’s borderline impossible to top it. It is the most point and click/easy to use of them all and it does not suffer because of it.
How to Setup IntelliJ and Illuminated Cloud 2
Here are the steps necessary to setup and be able to use Illuminated Cloud 2 for Salesforce development in IntelliJ.
1) Install the most recent JDK
2) Install the most recent version of IntelliJ Community Edition (or Ultimate if you want to pay for the advanced features)
3) After the JDK and IntelliJ have been installed, open IntelliJ and go to File -> Settings -> Plugins, click the Marketplace tab at the top and search for Illuminated Cloud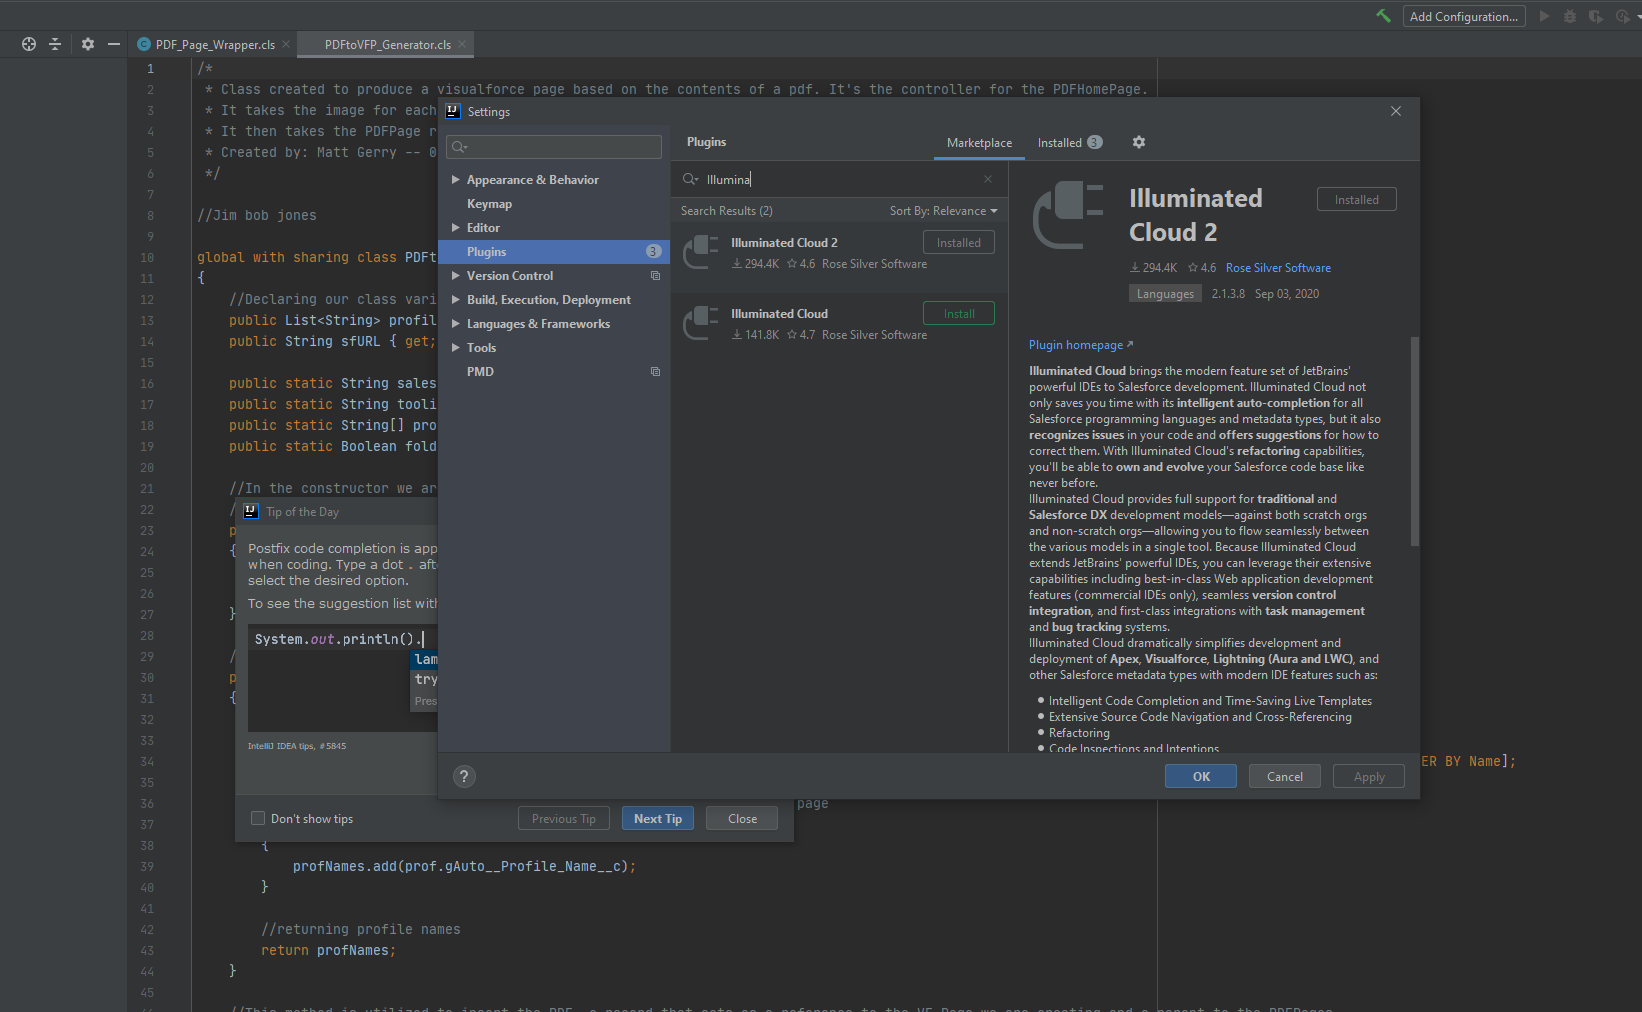
4) Click the install button to install Illuminated Cloud 2 (Do not install the original Illuminated Cloud option, it is outdated).
5) After Illuminated Cloud is done installing and IntelliJ restarts, start creating a new IntelliJ project. File -> New -> Project -> Illuminated Cloud.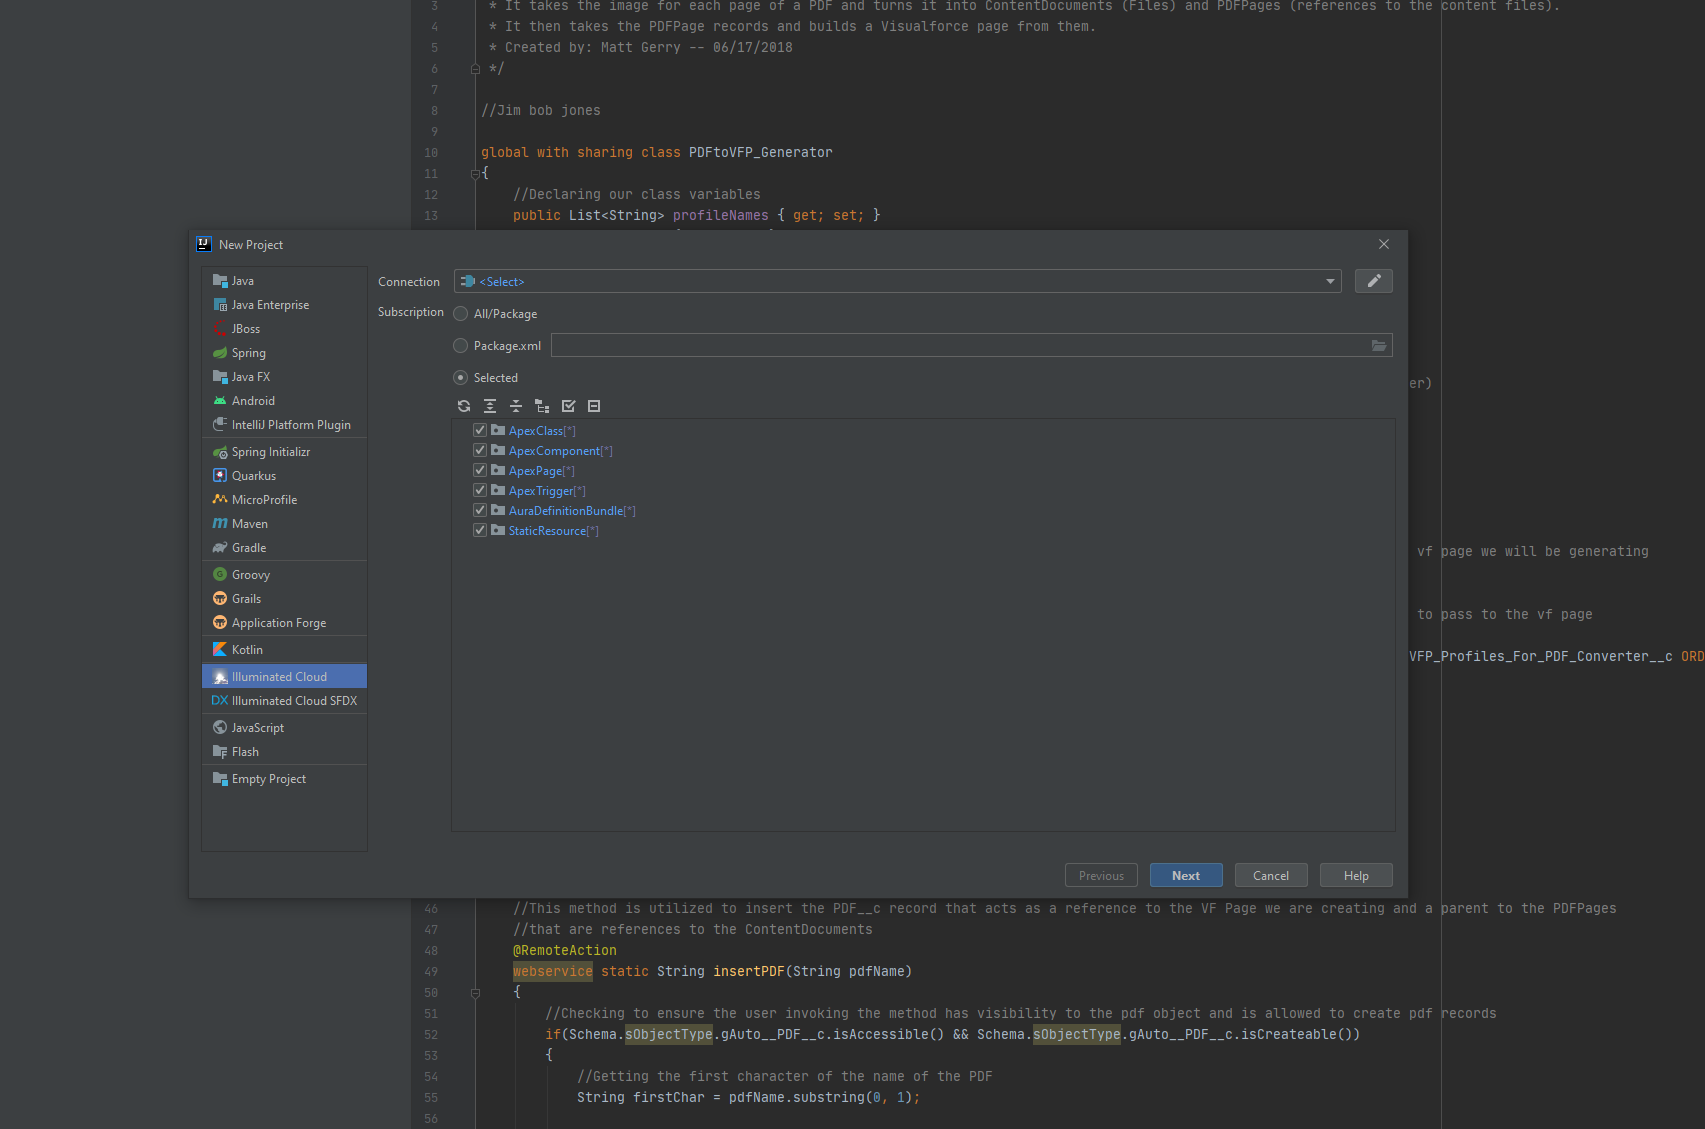
6) Click the “New Connection” button in the top right (the pencil icon). It will pop-up a new Connections modal. In that new modal click the “Create Connection” icon in the top left (the plug icon).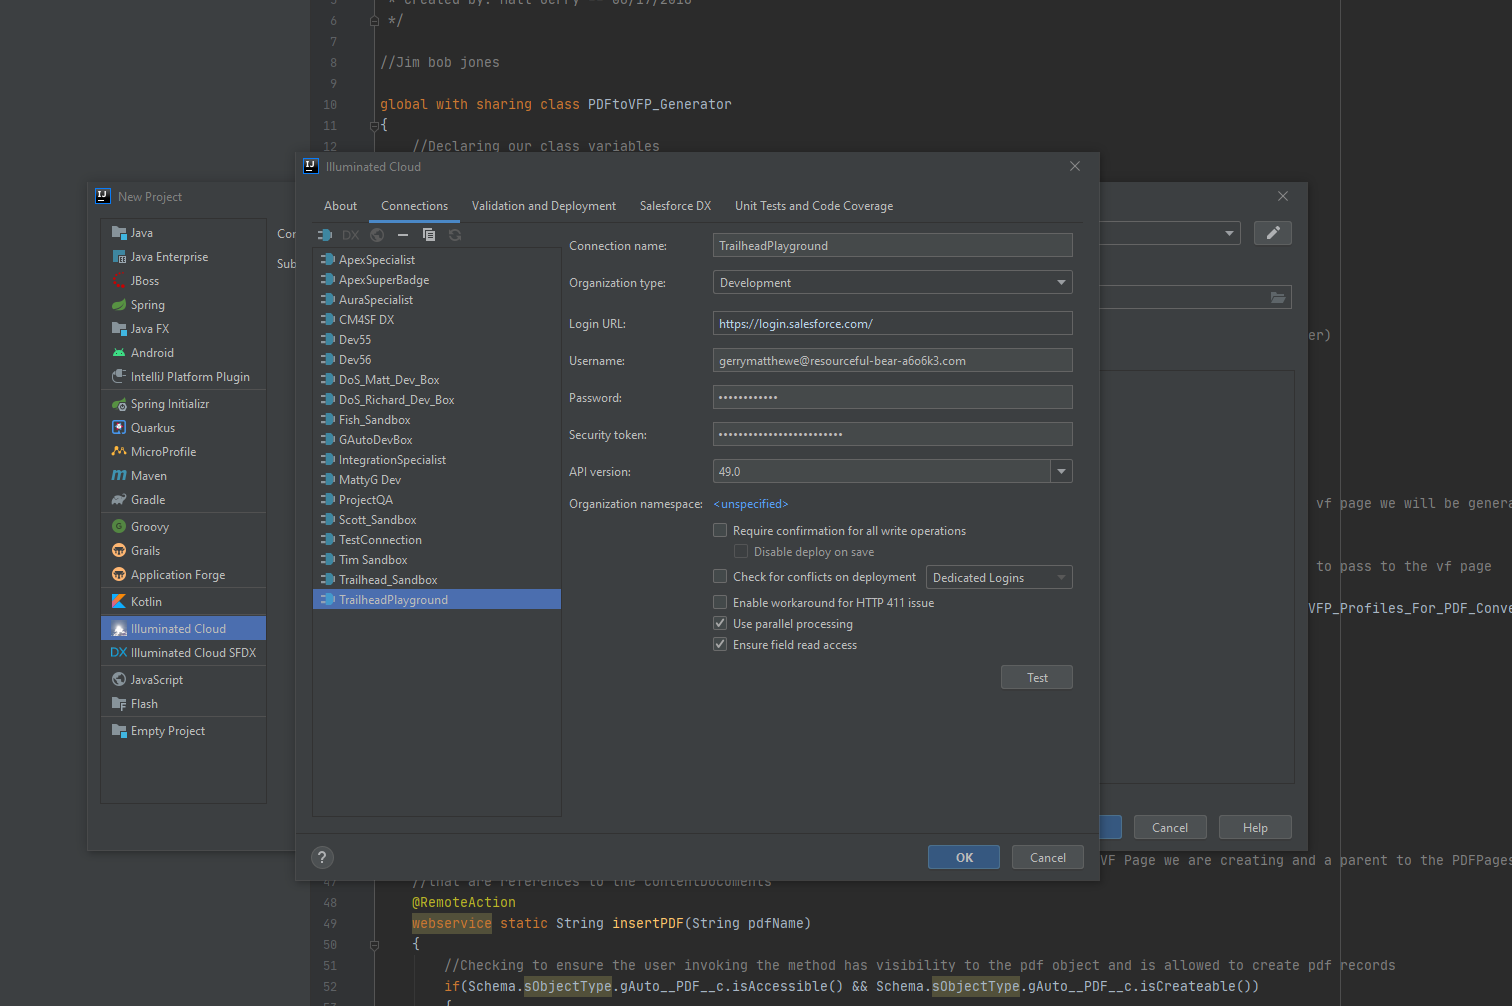
7) Enter the information it requests: Organization type, username, password, security token (if you don’t know what the security token is my video above explains where to find it in SF) and then click the “OK” button in the bottom right.
8) If you entered in the right connection information it will give you a confirmation message that your information was valid and it will connect to your org and give you a preview of the metadata you can pull from your org.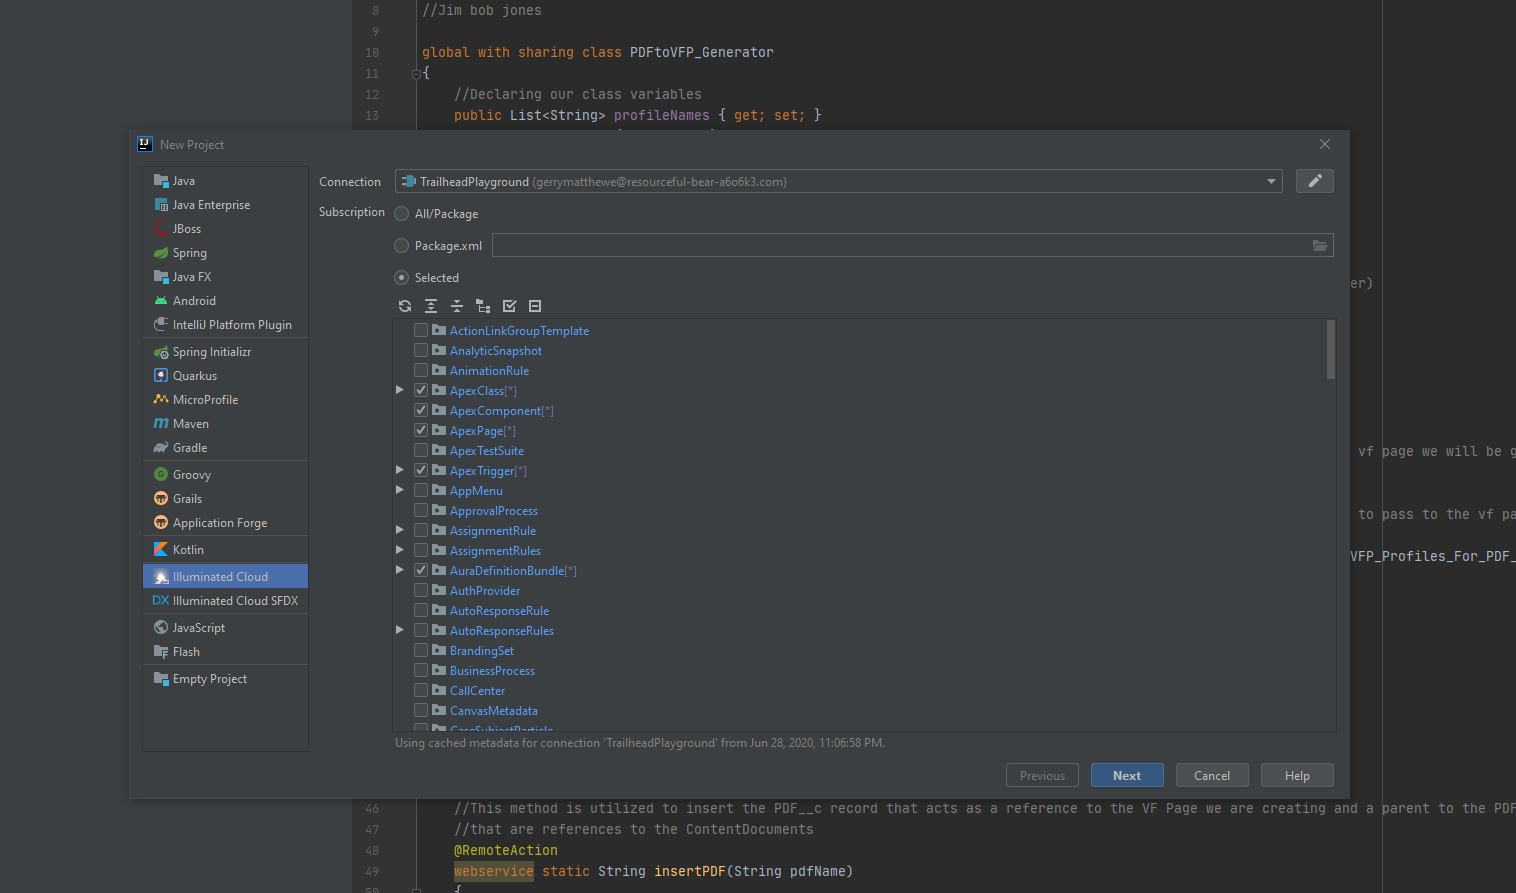
9) Check the checkboxes next to the metadata you would like to pull for your org and then hit the next button.
10) After hitting the next button, name your project and module whatever you’d like to name them and then click the “Finish” button!
11) That’s it you did it! You can do SF dev work in IntelliJ!
Useful Illuminated Cloud 2/IntelliJ Hotkeys
There are a ton of useful hotkeys for both IntelliJ and Illuminated Cloud 2. You can find all the Illuminated Cloud 2 hotkeys here and all of the IntelliJ hotkeys here.
Here is my shortened list of hotkeys I use every single day:
1) Reformat Code: Crtl + Shift + L
2) Get more information about a method, object, field, etc: Ctrl + Q
3) Search your entire project: Ctrl + Shift + F
4) Go to external SF Documentation: Shift + F1
5) Go to highlighted Apex Class: Ctrl + N
6) Go to highlighted component: Ctrl + Shift + N
There are tons and tons more that are super useful, so be sure to check them all out!
Get Coding With The Force Merch!!
We now have a redbubble store setup so you can buy cool Coding With The Force merchandise! Please check it out! Every purchase goes to supporting the blog and YouTube channel.
Get Shirts Here!
Get Cups, Artwork, Coffee Cups, Bags, Masks and more here!
Check Out More Coding With The Force Stuff!
If you liked this post make sure to follow us on all our social media outlets to stay as up to date as possible with everything!
Youtube
Patreon
Github
Facebook
Twitter
Instagram
Salesforce Development Books I Recommend
Advanced Apex Programming
Salesforce Lightning Platform Enterprise Architecture
Mastering Salesforce DevOps