Salesforce Development: How to use Custom Settings to Bypass Your Triggers in Production
Why On Earth Would We Ever Build Trigger Bypasses?
This is an excellent question and one I wondered myself… until my team and I had to do a monstrous 50,000,000 record load into Salesforce for a deployment, lol. I was stumped… how on earth could I ever pull this off without taking days or weeks to upload that data. We’re not gonna into all the detail behind that monster data load, but we’ll just say turning off the triggers was a part of it. Then we were faced with the, you can’t turn off the system while we do this data load and I was like, fml, how though? As it turns out there is a way! And a really good and simple way if you leverage Custom Settings.
There are a number of other reasons to do this too. A data team that loads data that’s pre-transformed (doesn’t need to go through the trigger) or an integration that auto-transform the data and doesn’t need to be bogged down by a trigger. There are plenty more beyond these as well, but these are the major ones.
What are Custom Settings?
Custom Settings are much like Custom Metadata in that they are typically used in the same way as a config file in another programming language. That being said they are a bit different. Unlike custom metadata, custom settings allow you to change the values of the data you store based on the user that is currently running the code. So each user in your system can have different values for custom metadata records. Pretty nifty, if I do say so myself.
So How Do We Set This Bypass Up?
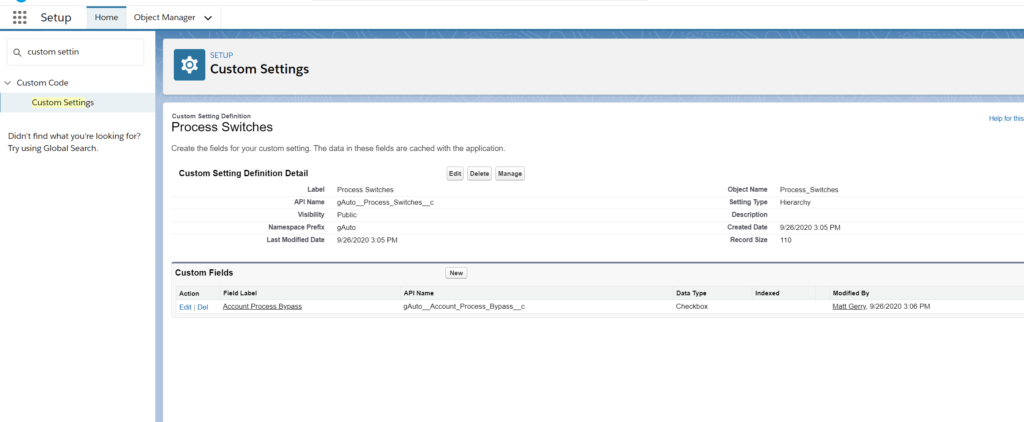
This is so simple it’s mind boggling, lol. All you need to do is setup a hierarchy custom setting object by going to Setup -> Custom Settings and then create Checkbox (Boolean) fields for each object you have a trigger for that you may want to bypass.
After you’re done setting that bad boi up. Click the “Manage” button at the top of your custom setting so that you can create records for it. After you do that you’re going to be presented with two different “New” buttons on the screen and it’s not super obvious what either of them do, so let me explain. The top “New” button is to make default values for ALL USERS in your org. This is the Default Organization Level Value. The bottom “New” button allows you to make new records that are only relevant to certain Users or Profiles. The bottom “New” button is what we want to click.
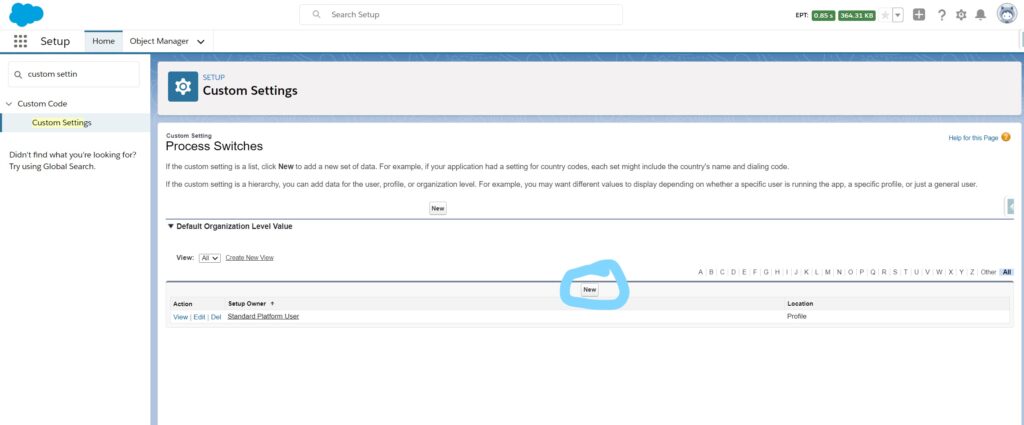
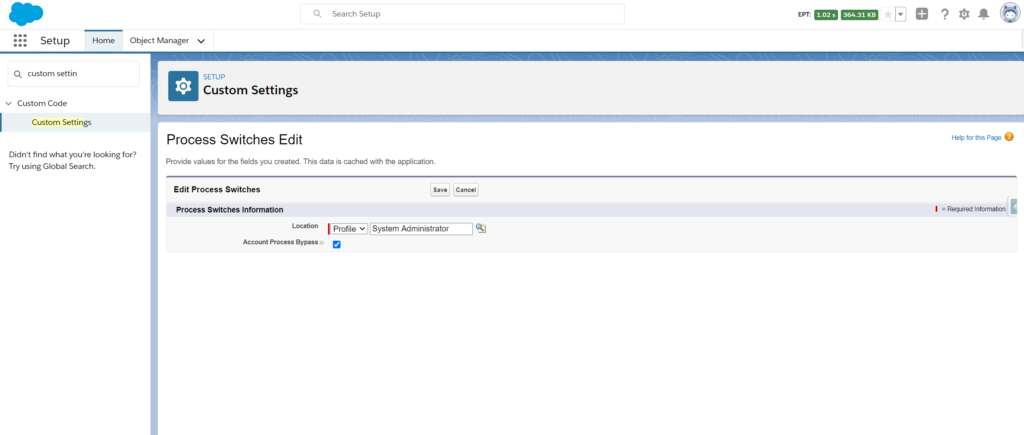
After clicking the bottom “New” button you’ll be presented with option to select a, “Location” which is the most confusing label of all time, lol. This just expects you to choose a User or a Profile which will then allow you to have unique values for Users and Profiles for your custom setting! Pretty Kewllllllll. Select the profile or user you would like to bypass your trigger(s) and select the checkboxes for the triggers they should bypass and then hit “Save”.
That’s it, pretty damn simple. Now on to the equally simple trigger code.
The Trigger Code
You might be thinking, oh no code… I’m sorry if you feel that way because code is the most amazing thing since General Tso’s Chicken. However, if you do, no worries, we need four lines of code… yes that’s it. Now before I show you this code, please note, you should be utilizing a trigger framework for your code and that no logic should live in your triggers… but that’s for another day. This is just a simple example, so lets check it out.
trigger Account_Trigger on Account (before insert)
{
        //Getting the Process_Switches__c custom setting value that is relevant to our running
        //user
	Process_Switches__c processSwitches
        Process_Switches__c.getInstance(UserInfo.getProfileId());

        //If the user can bypass the trigger, return and do not continue the trigger.
	if(processSwitches.Account_Process_Bypass__c)
	{
	    return;
	}

        //Call your trigger handler and run trigger logic
}
Woop, there it is. Pretty simple stuff. If you’re not familiar with Custom Settings and the unique ways to query data from them the whole [Custom Setting Name].getInstance(UserInfo.getProfileId()) might look a little confusing. It’s pretty simple though. It basically gets the custom setting record that is relevant for the running users profile. This makes sure we always get the correct record and only the right people are bypassing the trigger! Pretty kewl huh? And that’s it, yep, that’s really it. Now go enjoy a trigger free world where your data loads go lightning fast.
Get Coding With The Force Merch!!
We now have a redbubble store setup so you can buy cool Coding With The Force merchandise! Please check it out! Every purchase goes to supporting the blog and YouTube channel.
Get Shirts Here!
Get Cups, Artwork, Coffee Cups, Bags, Masks and more here!
Check Out More Coding With The Force Stuff!
If you liked this post make sure to follow us on all our social media outlets to stay as up to date as possible with everything!
Youtube
Patreon
Github
Facebook
Twitter
Instagram
Salesforce Development Books I Recommend
Advanced Apex Programming
Salesforce Lightning Platform Enterprise Architecture
Mastering Salesforce DevOps