Salesforce Development Tutorial (LWC): How to use Lightning Web Component’s in List View Buttons

Why Bother Using an LWC in a List View Button?

If you need to create some custom functionality that is accessible to your users via a list view (or potentially a related list), then a list view button is the way to go. The reason that you should prefer to utilize an LWC (despite the fact there is no obvious way to use an LWC for a list view button) is because LWC’s load faster than any other component type and, of the available list view button options, they are the most consistent with Salesforce’s Lightning Experience look and feel.

Unfortunately, while it’s super simple to setup and LWC for a list view button, Salesforce has no documentation on how to do so and virtually no answers exist for how to do this anywhere online, but NO MORE!! Today I’ll show you three different methods of creating an LWC List View button! Two methods do not allow you to send the ids of selected records in a list view and one does. I’ll give you the pros and cons of each and how to setup each one below.

One additional note, all of the below solutions will allow the user to traverse from the list view button back to the exact list view they were previously on without the help of visualforce at all! Something else that was undocumented and challenging to figure out.

DISCLAIMER: As of this writing, LWC quick actions are not usable on list views, this could change in the future however, so make sure to investigate that.


Setting up the Lightning Web Component

In any of the three scenarios we are going to use the same Lightning Web Component to demo the functionality, although in the third scenario (a flow based scenario) we will be making slight modifications to allow for the ids of records to get passed through to the component. Let’s take a look at the core of the component below (or on GitHub here).

HTML File:

<template>
	<lightning-button label="Return to List View" onclick={close}></lightning-button>
</template>

JS File:

import {LightningElement} from 'lwc';

export default class ListViewButton extends LightningElement {

	close(){
		setTimeout(
			function() {
				window.history.back();
			},
			1000
		);
	}
}

XML File:

<?xml version="1.0" encoding="UTF-8"?>
<LightningComponentBundle xmlns="http://soap.sforce.com/2006/04/metadata">
    <apiVersion>51.0</apiVersion>
    <description>List View Button</description>
    <isExposed>true</isExposed>
    <masterLabel>List View Button</masterLabel>
    <targets>
        <target>lightning__AppPage</target>
        <target>lightning__Tab</target>
        <target>lightning__FlowScreen</target>
    </targets>
</LightningComponentBundle>

Alright alright alright, so we have all of the files outlined above, let’s make talk about the close function in the JavaScript file first. I did an ENORMOUS amount of experimentation trying to get a list view button that spawns an LWC to allow me to traverse back to the exact list view that I had previously come from and this was the only way I could consistently get that to happen. I tried navigationmixin and it had trouble remembering where to go no matter what I did, I tried return urls, I tried a ton of junk, but that close function above does the trick every single time (at least in a browser, never tried on a mobile app). It always goes back to the exact list view I was on when I clicked the button.

So what does that function actually do? It basically looks to your browser windows history and moves back one page in time, the set timeout function allows it to take up to one second to make that happen. I would suggest using the set timeout as I had issues using this function without it, occasionally it wouldn’t have enough time to operate and failed. This however is used by thousands of users in my org now with no complaints.

The second thing I wanna go over is the XML File’s targets. For simplicity I just put every target we are going to need when we go through each of the three LWC list view button methods, that being said, you only need to declare the target for the method you choose to use. If you use the App Builder method, use the AppPage target, if you use the Tab method, use the Tab target, etc.


LWC List View Button Method 1: The Lightning App Builder Page Method

WHETHER YOU USE THIS METHOD OR NOT, READ THROUGH IT!! THE VAST MAJORITY OF THE STEPS ARE IDENTICAL FOR ALL OTHER VERSIONS SO THEY WILL ONLY BE SHOWN HERE AND REFERENCED IN THE OTHER SECTIONS!! Admittedly, this is my least favorite method, however it does work and some people may prefer it, so I’m gonna show you how to do it real quick. To use this method we need to create a lightning app builder app page. If you don’t know what that is, check out this trailhead. Once you’ve created the app builder page, you need to drag and drop the LWC (shown in the section above) onto the page. You can find the LWC in the section show below:

After you’ve placed your LWC on the page, save and activate your App Builder page. Then click anywhere in your lightning app page canvas that isn’t specifically your LWC to bring up the page information on the right side of the screen. Grab the “Developer Name” value, you need it for the next step.

Now that an app builder page houses our component, and we have the dev name for the app page, we need to setup a list view button to pop open our page for us. Kewlio Julio, let’s get to it.

Go to the object manager and find the object you are creating a list view button for. On the object page, click the “buttons links and actions” link, then click the “New Button or Link” on the top right of that page.

On the new button or link page, you are gonna fill out the follow:
1) Fill out a Label (this can be whatever you want)
2) Select the “List Button” display type
3) Select the “Display in existing window without sidebar or header” Behavior.
4) Select the “URL” Content Source
5) In the free text area put the following URL: /lightning/n/App_Page_Developer_Name
6) Save your button

To place your new LWC list view button on your objects list view, click on the “Search Layouts for Salesforce Classic” tab on your object and then click the drop down arrow next to the “List View” layout and select the “Edit” value in the drop down.

On the edit page for the list view layout, scroll down to the “Custom Buttons” section and select your new list view button.

Now, if you traverse to your object in the app launcher, you should be able to see your button on any list view and click it. This should result in your LWC popping up for you as shown below!

The Pros and Cons of this approach are the following:
Pros:
1) It’s the second fastest of the three options to load
Cons:
1) You cannot get rid of the app builder title area without janky css hacks
2) The tab method (outlined below) loads considerably faster.
3) This can load in an iframe depending on your settings.
4) Can’t pass in list view selection ids


LWC List View Button Method 2: The Lightning Component Tab Method

This is my absolute favorite method, it loads ultra fast and is the easiest to setup. If you don’t need list view ids passed into your LWC, this is the way to go in my opinion.

This method works much like the first method, the setup is virtually identical aside from the fact that you setup a Lightning Component Tab to use as opposed to a Lightning App Builder App Page. Even the List View button setup is the same, the only difference is that you use the lightning tabs developer name at the end of the URL. So to save my hands some typing I’m only gonna show you the tab setup, please refer to the rest of the steps in the App Builder setup instruction above.

To setup a tab to use instead of an app builder page is simple. In setup go to Tabs. Then on the Tabs screen, scroll down to the “Lightning Component Tabs” and select the “New” button.

On the new lightning component tab screen select your lightning component (the one shown above or the one you’ve built), enter a tab label, a tab name and select a tab style and you’re done. MAKE SURE YOUR LWC HAS A TARGET IN THE XML FOR TABS (this is shown in the code up above), otherwise it won’t be selectable.

Once you’ve created your tab, just follow the exact steps outlined in the app builder app page scenario to for the lightning button setup and you’re done!

Pros and Cons of this approach:
Pros:
1) Fastest load time
2) Easiest setup
3) Never loads in an iFrame
Cons:
1) Cannot load in list view ids from selected list view values


LWC List View Button Method 3: The Flow Screen Method

I will urge you to please not use this method unless you absolutely need the selected list view ids passed into your LWC. I say this because the load times are significantly slower and now you have to involve two technologies (flow and lwc) instead of one, making it more complex to deal with, albeit not by a ton.

The steps for setting up the actual list view button for this method are virtually identical to others as well, aside from the URL structure for the list view button, which we will cover, but refer to the first method for setting up the majority of the actual button.

Alrightyyyyy then, here we go. This final method utilizes a flow to allow us to capture the incoming selected list view ids and send them to our LWC to manipulate.

The first thing we need to do is update our LWC a bit to allow it to receive these incoming list view ids, so let’s do thattttttt. I’ll post the code below and then discuss it.

HTML:

<template>
	<p>These are the list view ids passed: {listViewIds}</p>
	<lightning-button label="Return to List View" onclick={close}></lightning-button>
</template>

JS:

import {LightningElement, api} from 'lwc';

export default class ListViewButton extends LightningElement {
	@api listViewIds;

	close(){
		setTimeout(
			function() {
				window.history.back();
			},
			1000
		);
	}
}

XML:

<?xml version="1.0" encoding="UTF-8"?>
<LightningComponentBundle xmlns="http://soap.sforce.com/2006/04/metadata">
    <apiVersion>51.0</apiVersion>
    <description>List View Button</description>
    <isExposed>true</isExposed>
    <masterLabel>List View Button</masterLabel>
    <targets>
        <target>lightning__AppPage</target>
        <target>lightning__Tab</target>
        <target>lightning__FlowScreen</target>
        <target>lightning__RecordAction</target>
    </targets>
    <targetConfigs>
        <targetConfig targets="lightning__FlowScreen">
            <property name="listViewIds" type="String[]"></property>
        </targetConfig>
    </targetConfigs>
</LightningComponentBundle>

First let’s talk about the JavaScript file. We added two things to that file, the first is that we are now importing api at the top so that we can use the api decorator. The second is that we have created the listViewIds variable with the @api decorator on it. This allows the variable to be written to by the flow.

Next let’s talk about the metadata file, in the metadata file we have added a targetConfig. This target config allows us in the flow builder to declaratively assign the incoming list view ids to the LWC’s listViewIds variable.

Last, in the HTML file we have just created a paragraph tag to view the list view ids when they are brought over.

Now that we’ve updated the component, we need to create the flow. In setup, go to Flows and then select “New Flow” at the top to create a new flow.

You will immediately be presented with options for the type of flow you’d like to create, select “Screen Flow” and press the “Next” button., then select the “Freeform” option. You will then land on the flow builder canvas.

The first thing we need to do is create a variable. In the “Toolbox” area on the left side of the screen click the “Manager” tab and then click the “New Resource” button.

After clicking the “New Resource” button a modal will pop-up. Do the following:
1) For Resource Type select “Variable”
2) Fill out the API Name field with the value “ids” (do not include the surrounding quotes). IT MUST BE THIS VALUE TO WORK!
3) For “Data Type” select “Text”
4) Check the, “Allow Multiple Values (Collection)” checkbox
5) Check the, “Available for input” checkbox
6) Click the “Done” button


After setting up this variable you’ll need to grab a screen flow from the “Elements” tab in the toolbox and drag it onto the flow canvas.

On the Screen element modal that pops up you’ll want to do the following:
1) Enter a label and API Name
2) Uncheck the “Show Header” checkbox
3) Uncheck the “Show Footer” checkbox
4) On the left side of the modal in the “Components” area select your LWC and drop it on the page
5) Fill out the API Name for your component
6) place the “ids” variable we created above in the “listViewIds” box for the LWC
7) Click the “Done” button

Then connect your start node to your new screen node, grab the API name of your flow from the settings area of the flow canvas, activate your flow and you’re done!

The one and ONLY step that changes for the list view button setup for the flow variety is the url structure. The URL structure should be changed to the following: /flow/Flow_Developer_Name

Aside from the above, all of the other steps are the same, so please reference the first LWC Button setup method above for more info.

Pros and Cons of this method:
Pros:
1) This is the only method that can receive the ids of values selected in a list view

Cons:
1) This is by far the slowest loading method
2) It forces you to use a flow to embed your LWC
3) It’s the most complex setup
4) It hosts itself in an iFrame

Alright, that’s all folks, this blog post was long and my hands are tired. Hasta Luego!!!!!


Get Coding With The Force Merch!!

We now have a redbubble store setup so you can buy cool Coding With The Force merchandise! Please check it out! Every purchase goes to supporting the blog and YouTube channel.

Get Shirts Here!
Get Cups, Artwork, Coffee Cups, Bags, Masks and more here!


Check Out More Coding With The Force Stuff!

If you liked this post make sure to follow us on all our social media outlets to stay as up to date as possible with everything!

Youtube
Patreon
Github
Facebook
Twitter
Instagram


Salesforce Development Books I Recommend

Advanced Apex Programming
Salesforce Lightning Platform Enterprise Architecture
Mastering Salesforce DevOps

Good Non-SF Specific Development Books:

Clean Code
Clean Architecture

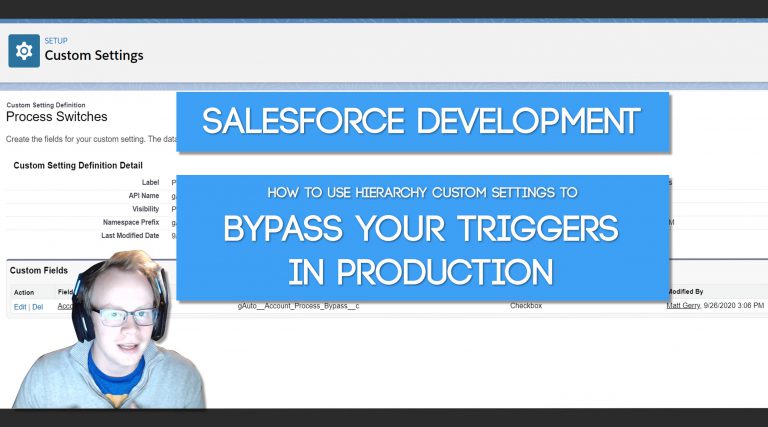
Salesforce Development: How to use Custom Settings to Bypass Your Triggers in Production

Why On Earth Would We Ever Build Trigger Bypasses?

This is an excellent question and one I wondered myself… until my team and I had to do a monstrous 50,000,000 record load into Salesforce for a deployment, lol. I was stumped… how on earth could I ever pull this off without taking days or weeks to upload that data. We’re not gonna into all the detail behind that monster data load, but we’ll just say turning off the triggers was a part of it. Then we were faced with the, you can’t turn off the system while we do this data load and I was like, fml, how though? As it turns out there is a way! And a really good and simple way if you leverage Custom Settings.

There are a number of other reasons to do this too. A data team that loads data that’s pre-transformed (doesn’t need to go through the trigger) or an integration that auto-transform the data and doesn’t need to be bogged down by a trigger. There are plenty more beyond these as well, but these are the major ones.

What are Custom Settings?

Custom Settings are much like Custom Metadata in that they are typically used in the same way as a config file in another programming language. That being said they are a bit different. Unlike custom metadata, custom settings allow you to change the values of the data you store based on the user that is currently running the code. So each user in your system can have different values for custom metadata records. Pretty nifty, if I do say so myself.

So How Do We Set This Bypass Up?

This is so simple it’s mind boggling, lol. All you need to do is setup a hierarchy custom setting object by going to Setup -> Custom Settings and then create Checkbox (Boolean) fields for each object you have a trigger for that you may want to bypass.

After you’re done setting that bad boi up. Click the “Manage” button at the top of your custom setting so that you can create records for it. After you do that you’re going to be presented with two different “New” buttons on the screen and it’s not super obvious what either of them do, so let me explain. The top “New” button is to make default values for ALL USERS in your org. This is the Default Organization Level Value. The bottom “New” button allows you to make new records that are only relevant to certain Users or Profiles. The bottom “New” button is what we want to click.

After clicking the bottom “New” button you’ll be presented with option to select a, “Location” which is the most confusing label of all time, lol. This just expects you to choose a User or a Profile which will then allow you to have unique values for Users and Profiles for your custom setting! Pretty Kewllllllll. Select the profile or user you would like to bypass your trigger(s) and select the checkboxes for the triggers they should bypass and then hit “Save”.

That’s it, pretty damn simple. Now on to the equally simple trigger code.


The Trigger Code

You might be thinking, oh no code… I’m sorry if you feel that way because code is the most amazing thing since General Tso’s Chicken. However, if you do, no worries, we need four lines of code… yes that’s it. Now before I show you this code, please note, you should be utilizing a trigger framework for your code and that no logic should live in your triggers… but that’s for another day. This is just a simple example, so lets check it out.

trigger Account_Trigger on Account (before insert)
{
        //Getting the Process_Switches__c custom setting value that is relevant to our running 
        //user
	Process_Switches__c processSwitches 
        Process_Switches__c.getInstance(UserInfo.getProfileId());

        //If the user can bypass the trigger, return and do not continue the trigger.
	if(processSwitches.Account_Process_Bypass__c)
	{
	    return;
	}

        //Call your trigger handler and run trigger logic
}   

Woop, there it is. Pretty simple stuff. If you’re not familiar with Custom Settings and the unique ways to query data from them the whole [Custom Setting Name].getInstance(UserInfo.getProfileId()) might look a little confusing. It’s pretty simple though. It basically gets the custom setting record that is relevant for the running users profile. This makes sure we always get the correct record and only the right people are bypassing the trigger! Pretty kewl huh? And that’s it, yep, that’s really it. Now go enjoy a trigger free world where your data loads go lightning fast.


Get Coding With The Force Merch!!

We now have a redbubble store setup so you can buy cool Coding With The Force merchandise! Please check it out! Every purchase goes to supporting the blog and YouTube channel.

Get Shirts Here!
Get Cups, Artwork, Coffee Cups, Bags, Masks and more here!


Check Out More Coding With The Force Stuff!

If you liked this post make sure to follow us on all our social media outlets to stay as up to date as possible with everything!

Youtube
Patreon
Github
Facebook
Twitter
Instagram


Salesforce Development Books I Recommend

Advanced Apex Programming
Salesforce Lightning Platform Enterprise Architecture
Mastering Salesforce DevOps