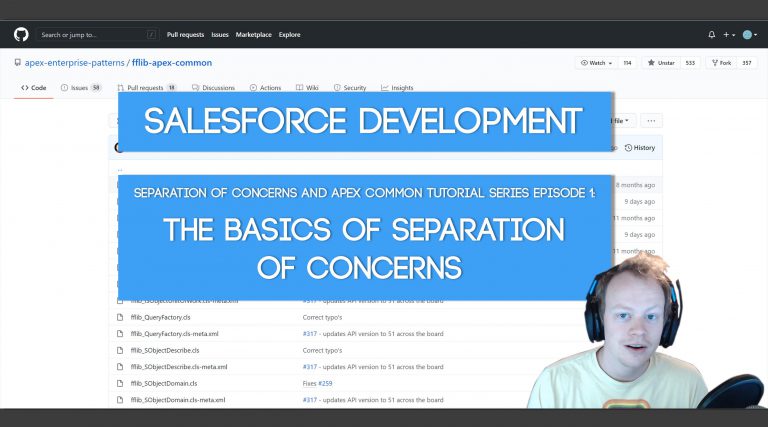
SoC and the Apex Common Library Tutorial Series Part 1: Introduction to the Separation of Concerns Design Principle


What is the Separation of Concerns Design Principle?

Basically separation of concerns is the practice of putting logical boundaries on your code. Putting these logical boundaries on your code helps make your code easier to understand, easier to maintain and much more flexible when it needs to be altered (and every code base ever has to be altered all the time).

In the Salesforce Ecosystem there are three major areas of concern we ideally should separate our code into. They are the following:

The Service Layer:

The Service Layer should house 100% of your non-object specific business logic (object specific logic is most often handled by the domain layer). This is, the logic that is specific to your organizations specific business rules. Say for instance you have a part of your Salesforce App that focuses on Opportunity Sales Projections and the Opportunity Sales Projection App looks at the Oppotunity, Quote, Product and Account objects. You might make an OpportunitySalesProjection_Service apex class that houses methods that have business logic that is specific to your Opportunity Sales Projection App. More information on the Service Layer here.

The Domain Layer:

The Domain Layer houses your individual objects (database tables) trigger logic. It also houses object specific validation logic, logic that should always be applied on the insert of every record for an object and object specific business logic (like how a task my be created for a specific object type, etc). If you used the Account object in your org you should create a Domain class equivalent for the Account object through the use of a trigger handler class of some sort. More information on the Domain Layer here.

The Selector Layer:

The Selector Layer is responsible for querying your objects (database tables) in Salesforce. Selector layer classes should be made for each individual object (or grouping of objects) that you intend to write queries for in your code. The goal of the selector layer is to maintain query consistency (consistency in ordering, common fields queried for, etc) and to be able to reuse common queries easily and not re-write them over and over again everywhere.


Why is it Useful?

There are many benefits to implementing SoC, most of which were outlined above, but here are the highlights:

1) Modularizes your code into easy to understand packages of code making it easier to know what code controls what, why and when.

2) Massively reduces the amount of code in your org by centralizing your logic into different containers. For instance, maybe you currently have 13 different apex controllers that house similar case business logic. If you placed that business logic into a service class and had all 13 apex controllers call that service class instead your life would be a whole lot simpler. This can get a lot more abstract and turn into absolutely unprecedented code reduction, but we have to start somewhere a bit simpler.

3) Separation of Concerns lends itself to writing extremely well done and comprehensive Unit Tests. It allows for easy dependency injection which allows you to, in test classes, mock a classes dependent classes. We’ll go over this more when we get to the Unit testing and Apex Mocks section of this tutuorial, but if you want a quick and easy explanation, please feel free to check out my video covering dependency injection and mocking in apex.


How does the Apex Common Library help with SoC?

The Apex Common Library was quite literally built upon the three layers outlined above. It provides an unrivaled foundation to implement SoC in your Salesforce org. When I started this tutorial series I was not convinced it was the absolute best choice out there, but after hundreds of hours of practice, documentation, experimentation with other similar groupings of libraries, etc I feel I can confidently say (as of today) that this is something the community is lucky even exists and needs to be leveraged much more than it is today.


Example Code

All of the code examples in this repo are examples of SoC in action. You can check the whole repo out here. For layer specific examples check out the layer specific pages of this wiki.


Next Section

Part 2: Introduction to the Apex Common Library

Salesforce Admin Tutorial: How to Create Unique Person Account Search Layouts using formula fields

https://youtu.be/bISt9GpFzH4

Why would you want to make unique person account search layouts?

If you’re reading this, chances are you already know the answer to this, but just in case, let’s go over why you would want/need to do this.

If you didn’t know, person account search layouts are determined by the account object and that’s because person accounts are just a mash up of a contact and an account record. Every time you create a person account you are creating 1 contact record and 1 account record.

Due to the fact that the search layout is controlled by the account object, you will likely run into the following problem eventually: A group of users needs to see both person accounts and business accounts. That group of users will also get very frustrated that when searching for accounts it’s not always clear which one is a person account and which is a business account. They will also get frustrated that there are a bunch of useless fields for either the business or person accounts in their search layouts.

So how do we fix this issue?? Formula fields!! Woot!


Formula Fields to the Rescue

Thankfully, in the background, Salesforce has a field called IsPersonAccount on the Account object that is a checkbox. This checkbox allows us to know whether an account is a person account or not a person account. It also comes in great handy in search layouts and formula fields (as well as code, but we’re not gonna cover that today).

So basically what we need to do is create formula fields for our search layouts that render one field for business accounts and another field for person accounts and then put those formula fields in the search layout that the users are assigned who have access to both person and business accounts.

Let me show you an example formula for a search layout field:

IF(IsPersonAccount, PersonContact.MailingStreet, BillingStreet)

What the formula above is doing is doing is the following. If the account is a person account, show the person account mailing street. If the account is not a person account, show the billing street.

If you just follow that example above you can make the search layout fields render whatever you need them too. It’s not perfect, but it’s as close as we can get today. You then just add these formula fields to the search layout for your users and they dynamically render the correct information for the different account types.

I would also suggest adding the IsPersonAccount field to the search layout as well. It allows users to easily Id if an account is a person account or a business account.


Get Coding With The Force Merch!!

We now have a redbubble store setup so you can buy cool Coding With The Force merchandise! Please check it out! Every purchase goes to supporting the blog and YouTube channel.

Get Shirts Here!
Get Cups, Artwork, Coffee Cups, Bags, Masks and more here!


Check Out More Coding With The Force Stuff!

If you liked this post make sure to follow us on all our social media outlets to stay as up to date as possible with everything!

Youtube
Patreon
Github
Facebook
Twitter
Instagram


Salesforce Development Books I Recommend

Advanced Apex Programming
Salesforce Lightning Platform Enterprise Architecture
Mastering Salesforce DevOps

Good Non-SF Specific Development Books:

Clean Code
Clean Architecture

Salesforce Administration Tutorial: How to Setup Okta Single-Sign On (SSO)

Why Setup Okta at all?

This is a perfectly legitimate question, one I asked myself around 4 years ago when I setup my first Okta integration with Salesforce. The answer to this question is pretty straight forward though, let me break it down for you.

Okta Benefit #1: At the company you work for you might have 20+ different systems that users could/should be given access to and someone at your company has to manage all that access (hopefully). To simplify that problem you setup and use an access management tool like Okta. That way the person in charge of access management at your company doesn’t have to provision users by going to each individual system and provisioning them, but rather they can do all that from Okta. In short, it makes the person in charge of access management for your company’s life much easier.

Okta Benefit #2: You probably want to make sure your different apps have the same authentication policy everywhere. In other words, when a user logs in to a system they should always have the same company enforced password policies. By using Okta SSO for your systems you can make sure that the password/login policies are all the same for your org and you can easily ensure they are following policy.


Setting up your Salesforce My Domain

Before we get too far into this, if you want service provider initiated authentication to working on your Salesforce login page, you need to setup your My Domain in Salesforce. Unless something has recently changed I don’t believe this is mandatory for Identity provider initiated authentication, but chances are you’ll want to setup both authentication types.

The choice is yours, but make sure to consider this step before setting up Okta.


Creating a free Okta Developer Account

If you’re an admin reading this, don’t worry, we’re not doing any true development here, but we do need a free Okta dev account so we setup and test out our single sign-on integration with Salesforce.

You can get a free dev account here: Sign-up for a free Okta Developer Account


Setting up Okta Single Sign-On

The first this we’re gonna do after setting up our account is go into Okta and click the Applications tab. Once there click the “Add Applications” button.

After clicking the add applications button click, search for Salesforce.com in the search bar. DO NOT SELECT THE SALESFORCE FEATURED INTEGRATION!!! The featured integration does not have to ability to use SAML which we will need. There are multiple Salesforce apps in Okta. Make sure to search for and select the Salesforce.com app.

After selecting the correct Salesforce App, make sure to click the “Add” button to add the app. After adding the app you’ll need to setup its general settings. Make sure to do three things on the general settings page:

1) Select the correct instance type
2) Enter your custom my domain if you have in Salesforce in the “Custom Domain” text field.
3) Enter the correct User Profile & Type value

I typically leave the rest as is (aside from the name field, I typically change that to something more meaningful), but that’s ultimately up to you and what your okta setup needs.

After setting up your general settings, click the “Next” button in the bottom right of the page to start setting up your Sign-On Options.

In the sign in options area we want to select “SAML 2.0” as our Sign-On Method. Then we wanna click the “View Setup Instructions” button. This is super important, the “View Setup Instructions” button actually generates some values in the document it pops up that we’re gonna need when we go back to Salesforce in just a second and setup our SSO record.

Now, let’s open Salesforce in a new tab and setup our single sign-on settings and create an SSO record.

1) After opening a new tab with Salesforce go to Setup -> Single Sign-On Settings

2) Click the “Edit” button on the top of the Single Sign-On Settings page and then check the “SAML Enabled” checkbox.

3) After enabling SAML, go back to the Single Sign-On Settings page and click the “New” button for SAML Single Sign-On Settings.

4) Name the SSO record in Salesforce whatever you want.

5) Put your Salesforce My Domain url in the Entity Id field or https://saml.salesforce.com if you don’t have a My Domain setup.

6) Follow the instructions in step 6 of the Okta Setup Instructions, you opened up in Okta just a little bit ago, to fill out the rest of the SSO record in Salesforce.

7) Save your SSO record

8) After saving your record you should see an “Endpoints” section on your Salesforce SSO record and one of those endpoints should be a login URL. Copy that URL and go back to your Okta Salesforce.com App’s Sign-On Options page.

9) Once you’re back to your Salesforce.com app in okta, place the Login URL you copied from Salesforce into the Login URL in your Okta Salesforce.com App.

10) Click the “Done” button at the bottom of the page in Okta.

11) That’s it your SSO setup is done! Now we just need to important our users into Okta from Salesforce.


How to setup our Salesforce integration to import our Users from Salesforce into Okta

The final thing we need to do is import our users from Salesforce into Okta so that we can assign them the Salesforce app in Okta and give them access to Okta in general.

To this we need to do a few things:

1) In the Salesforce.com App we just setup in Okta we need to click the provisioning tab.

2) We then need to click the “Configure API Integration” button

3) After clicking that button we need to check the “Enable API Integration” checkbox that pops up and then enter our username and password + security token.

4) Click the “Test API Credentials” button to make sure you are connecting successfully to Salesforce.

5) Click the “Save” button after you connect successfully


How to Import our Users from Salesforce to Okta

Now that we have our integration setup, importing users is pretty simple we just need to follow a few steps:

1) In your Salesforce.com app in Okta click the Import tab.

2) Click the “Import Now” button on the import tab. This will scan your Salesforce org for users who aren’t yet assigned to the Salesforce.com app in Okta.

3) After the users are scanned in Salesforce, Okta will display a list of users who are not currently assigned to your Salesforce app in Okta. Check the boxes next to each user you intend to import into Okta and assign to the Salesforce app

4) After checking the boxes next to the users, click the “Confirm Assignments” button to confirm the users should be brought into Okta and assigned to the Salesforce.com app.

5) You did it! All done!


Demoing your Single Sign-On from Okta to Salesforce

If you set everything up right and you linked your Okta user with your Salesforce user, you should be able to click the “My Apps” button at the top of the screen and see your Salesforce.com app as a button you can click once you are at your My Apps screen. Clicking that Salesforce.com button should automatically sign you in to Salesforce! Woot!!


How to setup Service Provider Initiated Authentication in Salesforce

This part is super easy as long as you followed along above and created a my domain. We just need to do the following:

1) In Salesforce go to Setup -> My Domain

2) In the “Authentication Configuration” section of My Domain, click the edit button

3) Check the box next to the “Authentication Service” that represents the SSO record you setup for Okta just a little while ago.

4) Click the “Save” button

5) All done! You can test this out by logging out of Salesforce and using the new Okta button you see on your login page!


Get Coding With The Force Merch!!

We now have a redbubble store setup so you can buy cool Coding With The Force merchandise! Please check it out! Every purchase goes to supporting the blog and YouTube channel.

Get Shirts Here!
Get Cups, Artwork, Coffee Cups, Bags, Masks and more here!


Check Out More Coding With The Force Stuff!

If you liked this post make sure to follow us on all our social media outlets to stay as up to date as possible with everything!

Youtube
Patreon
Github
Facebook
Twitter
Instagram


Salesforce Development Books I Recommend

Advanced Apex Programming
Salesforce Lightning Platform Enterprise Architecture
Mastering Salesforce DevOps

Good Non-SF Specific Development Books:

Clean Code
Clean Architecture